|
HOW TO DRAW CHERRIES WITH COLORED PENCIL Follow the instructions and and the visual guide showing the color and the amount of pressure you need to apply. You can substitute the colors with its nearest match just in case you don't have one in your set. Be sure to read the COLORED PENCIL BASICS before you begin the lesson. Feel free to leave comments or any questions that you may have. I’ll also appreciate it if you can send me a link to your finished drawing. For quicker replies, you can send me a message on my Facebook page. Happy drawing! COLORED PENCIL BASICS Get Started With Colored Pencils Part 1: COLORED PENCIL Get Started With Colored Pencils Part 2: SHARPENER Get Started With Colored Pencils Part 3: PAPER Image Transfer Method — Watch related video or Read related article. Pencil Stroke and blending technique — Watch this video by Janie Gildow. HOW TO HOLD THE PENCIL 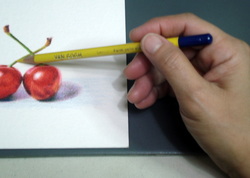 LIGHT PRESSURE Hold the pencil near its end. Good for laying down a light wash of color with the white of the paper still showing through. 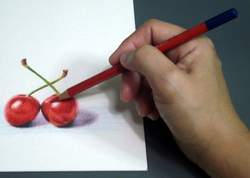 MEDIUM PRESSURE Hold the pencil halfway down the shaft. Good for light blending and gives a more saturated color. 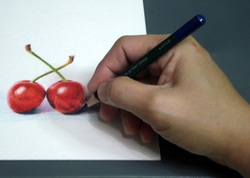 HEAVY PRESSURE
Hold the pencil near it's point and press firmly. Good for burnishing and for heavy blending of colors.
3 Comments
Margaret Hamm
7/13/2014 09:57:55 pm
Thanks very much for sharing.
Kelsey
1/4/2015 02:29:26 pm
This is such a fantastic tutorial. So few tutorials really explain layering and how pressure is essential to the process. Leave a Reply. |

Bleuie AcostaSharing with you my knowledge and experience in the art of colored pencils. Your colour pencil drawings are an inspiration to me as you show what can be done with these pencils and introduce a variety of colours which I would not think of using. Thank you. --Valerie Clare
Categories |
 RSS Feed
